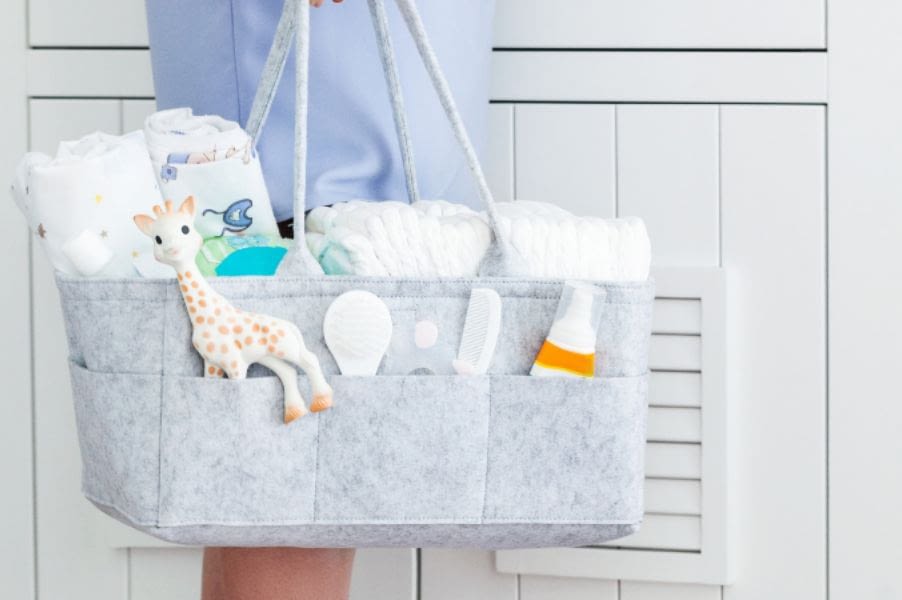
Becoming a new mom is an exhilarating journey filled with joy, love, and countless diaper changes. As you navigate through the early stages of motherhood, you’ll quickly discover that diapers tend to accumulate faster than you ever imagined. That’s where the Diaper Genie comes to the rescue!
This ingenious invention helps contain those dirty diapers while keeping your nursery smelling fresh and clean. If you’re new to Diaper Genies or simply looking for expert tips, you’ve come to the right place!
This guide will walk you through the effective use of a Diaper Genie. From assembling and setting it up to emptying and maintaining it, I’ll cover all the bases so you can confidently use this game-changing device. So, let’s dive in and discover how to use a Diaper Genie Complete Like a Pro!
A Quick Introduction to the Diaper Genie
Before we jump into the nitty-gritty details of using it, let’s start with a quick introduction to this magical contraption.
What is a Diaper Genie?
A Diaper Genie is a specialized disposal system explicitly designed for disposing of dirty diapers. It offers an odour-locking mechanism that keeps unpleasant smells contained within the unit, preventing them from permeating your nursery or home.
Why Should You Use a Diaper Genie?
Using a Diaper Genie provides numerous benefits for both you and your baby:
- Odor Control: The primary advantage of using a Diaper Genie is its ability to lock in odors. Trapping unpleasant smells in multiple layers of barrier bags ensures your baby’s room remains fresh and odor-free.
- Convenience: With its hands-free operation and easy-to-use design, using a Diaper Genie saves you time and effort during diaper changes. You won’t have to make frequent trips to the outside trash can, especially during those midnight diaper changes.
- Space Efficiency: They are compact and occupy minimal space in your nursery, making them ideal for small living areas or apartments.
- Eco-Friendly: Some models use refillable liners made from biodegradable materials, reducing your environmental impact compared to traditional plastic bags.
Types of Diaper Genies
Several types of Diaper Genie models are available on the market, each with unique features designed to cater to the needs of different parents. Here’s a detailed look at some of the most popular models:
- Diaper Genie Complete: This all-in-one diaper disposal system comes with a built-in odor controlling Antimicrobial that inhibits the growth of bacteria. The design features a foot pedal for hands-free diaper disposal and a front tilt bin for easy emptying. Its height also allows for a convenient, upright diaper disposal without bending down.
- Diaper Genie Expressions: This model offers the same basic functionalities as the Diaper Genie Complete but has customizable sleeves that allow you to decorate your unit to match your nursery’s décor.
- Diaper Genie Elite: It offers a hands-free disposal system, foot pedal, and front tilt bin like the Diaper Genie Complete. However, it also includes a carbon filter that helps absorb odors for up to three months.
- Diaper Genie Essentials: This version is a budget-friendly option that still provides hands-free diaper disposal with a foot pedal and front tilt bin. It also has an integrated cutter to make bag replacement quick and easy.
You can find the perfect small Diaper Genie with various models that fit your needs and nursery style. So, explore your options and find the ideal model for you and your little one!
How to work a diaper genie?
I recently discovered the wonders of the Diaper Genie. It’s fascinating how this innovative system seals each diaper in a thin layer of plastic, creating a barrier that locks in odors. When you drop a dirty diaper into the Genie, it effortlessly falls into a plastic bag lined with a sealing mechanism.

The Genie’s clever system of seals and traps ensures no smells escape. And here’s the best part: when you shut the top lid, the sealing device magically twists the bag, forming a secure knot containing the diaper.
But wait, there’s more! The Diaper Genie even features a built-in carbon filter that absorbs lingering smells, leaving your house fresh and clean. Trust me, the Diaper Genie is a game-changer regarding simple and sanitary diaper removal. It’s not Aladin’s Genie, but it’s a brilliant innovation every parent needs!
Step-by-step guide: How to use a diaper genie?
Now that I’ve covered the basics, it’s time to explore the step-by-step process of using a Diaper Genie effectively.
Step: 1 Setting Up Your Diaper Genie
To start using your Diaper Genie, you must set it up correctly. Follow these simple steps:
- Choose the Right Location: Select a convenient spot in your nursery or bathroom for your Diaper Genie. Ensure it’s within reach but away from direct sunlight or heat sources.
- Gather Your Supplies: Before starting the assembly process, ensure you have all the necessary components and tools. Typically, these include the main unit, a lid or top cover, an empty cartridge or refill bag, and any additional accessories mentioned in the product manual.
Step: 2 Assembling Your Diaper Genie
When you first bring home a new Diaper Genie, you must assemble it before putting it into action. Here’s how you can do it:
Follow the Diaper Genie assembly instructions.
Every model may have slightly different assembly instructions. To avoid any confusion or mistakes during setup, carefully read and follow the manufacturer’s instructions. Most units require simple snap-together assembly without the need for additional tools.
Follow the steps below to assemble your Diaper Genie:
- Unpack all parts: Start by unpacking the Diaper Genie from its box. You should have a top section (with the lid and button), a middle section (with the cutter), and a bottom section (where the diapers will be stored).
- Connect the sections: Begin by aligning the top and middle areas. They should snap together easily. Repeat this process with the middle and bottom sections.
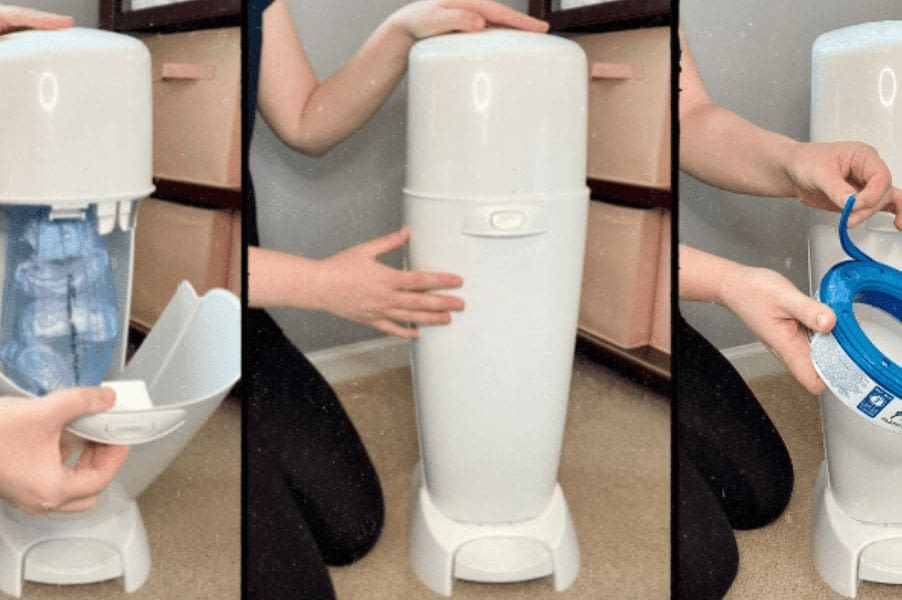
- Install the refill: How to install the refill or put bags in diaper genie? Open the lid of the Diaper Genie and insert a refill cartridge. Pull the plastic down through the middle section and tie a knot at the end. Close the lid, making sure the plastic hangs through.
- Test the system: Press the button or pedal (depending on your model) and check if the lid opens. If the lid opens, the system is correctly assembled, and you can see the plastic bag from the refill cartridge.
- Preparation for use: It is now assembled and ready for use. Remember to regularly check the fullness of the bag and replace the cartridge as needed to maintain optimal functionality.
Step 3: Using Your Diaper Genie
After setting up, it’s time to start using it. Here’s a step-by-step guide on how to use your Diaper Genie effectively:
1. Open the Lid: To begin, open the lid of your Diaper Genie by lifting the top compartment or pressing the button, depending on the model you have.
2. Place the Dirty Diaper Inside: Place a used diaper inside the opening at the top of the Diaper Genie. Push it down gently until it falls into the bag below.
3. Twist and Seal: Once you’ve disposed of a dirty diaper, twist the handle or close the lid completely, depending on your model. This action seals off each dirty diaper individually, preventing any odors from escaping.
4. Continue Adding Diapers: Repeat steps 2 and 3 for every dirty diaper you dispose of throughout the day. The convenient design allows you to dispose of diapers without touching or smelling them.
5. Emptying Your Diaper Genie
When your it is full, it’s time to empty it. Follow these steps:
- Open the bottom compartment or door of your Diaper Genie.
- Cut off the sealed portion at the bottom using a built-in cutter or scissors.
- Tie off this segment to create an individual bag filled with soiled diapers.
- Dispose of this bag in your regular trash bin.
Step 4: Maintaining Your Diaper Genie
Proper maintenance is essential to ensure long-lasting freshness and optimal performance from your Diaper Genie.
- Regularly Empty It: Avoid letting it become too full before emptying it out; this will prevent any unpleasant smell from seeping out.
- Replace Bag Refills: When you run out, replace them promptly to ensure continuous functionality.
- Clean the Unit: Periodically wipe it with a mild cleaning solution to keep it fresh and germ-free.
How to Empty a Diaper Genie?
As a new mom, you’re no stranger to the endless cycle of diaper changes. And if you’ve invested in a Diaper Genie, you know just how convenient it is for keeping those unpleasant smells at bay.
But now comes the inevitable task to empty Diaper Genie. Don’t worry. This comprehensive guide will walk you through how to empty your Diaper Genie effectively and efficiently. From gathering the necessary supplies to replacing the refill, consider this your go-to resource for mastering this essential parenting skill.
Gather Your Supplies
Before diving into the process of emptying it, it’s crucial to gather all the necessary supplies. Here’s what you’ll need:
- Rubber gloves: Protect your hands from any potential mess.
- Garbage bags: Have an extra bag or two ready for proper disposal.
- Disinfectant wipes or spray: Maintain cleanliness and hygiene during the process.
- Replacement refill cartridge: If your current cartridge is nearing its capacity, it might be time for a replacement.
Once you have these supplies, let’s move on to the next step.
Step 1: Safety First
Before starting any task involving waste disposal, it’s crucial to prioritize safety. Ensure that your little one is secure and out of reach from it while you work. This will prevent accidental spills or curious hands from interfering with the process.
Step 2: Open Up Your Diaper Genie
To begin emptying your Diaper Genie, locate and open up the unit’s lid. Most models will have a button or latch mechanism that allows easy access to its contents. Give it a quick press or lift according to your specific model’s diaper genie instructions.
Once opened, take a moment to familiarize yourself with the interior of the Diaper Genie. You’ll notice a long plastic tube or bag that securely holds the diapers.
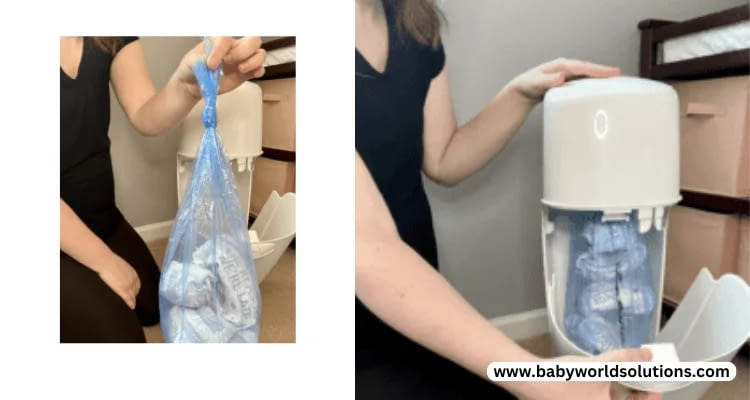
Step 3: Remove the Full Bag
With the lid open and the interior exposed, it’s time to remove the full bag of diapers. Carefully grab the plastic tube or bag and pull it out from within the Diaper Genie. Be cautious not to spill any contents during this step.
As you remove the full bag, you may encounter resistance due to its weight or size. Use your other hand for support, or transfer it directly into a garbage bag for easier handling.
Step 4: Seal and Dispose
Once you’ve successfully removed the full bag from your Diaper Genie, it’s essential to seal it tightly before disposal. Tie a secure knot at the top of the bag to prevent any odors from escaping.
Next, place the sealed bag into a larger garbage bag for additional containment. This extra layer helps ensure that no unpleasant smells linger in your home.
Finally, dispose of the double-bagged diaper bundle in an outdoor trash bin as soon as possible. This immediate removal will help maintain a fresh and odor-free environment for you and your baby.
Now that you’ve emptied your Diaper Genie let’s move on to one last step to keep it functioning effectively.
Step 5: Replace with a New Refill Cartridge
To maintain optimal performance for future diaper changes, consider replacing your Diaper Genie’s refill cartridge after emptying it. A fresh cartridge ensures maximum odor control and convenience when disposing of future diapers.
Follow your specific diaper genie instructions on replacing or installing a new cartridge. Typically, you’ll need to remove any remaining length of plastic from the previous refill before inserting and securing a new one.
By completing this final step, you can continue using your Diaper Genie confidently and efficiently.
Top 5 Diaper Genie Alternatives
- Ubbi Steel Odor Locking Diaper Pail: This sleek, steel diaper pail is a fantastic alternative to the Diaper Genie. It’s praised for its superior odor-locking technology and convenience, as it doesn’t require unique bags – just standard kitchen trash bags.
- Dekor Plus Hands-Free Diaper Pail: Designed for one-handed disposal, this diaper pail can hold up to 60 newborn diapers before emptying. The Dekor Plus also boasts a unique triple-seal system to keep odors contained.
- Munchkin Step Diaper Pail: This pail claims to be the best in the world for odor control. It comes with a step-pedal for easy opening and is compatible with refill rings and snap, seal, and toss bags.
- Safety 1st Easy Saver Diaper Pail: A budget-friendly option, this pail does not have the bells and whistles of its competitors but still does a commendable job in odor control. It uses standard plastic bags, making it a cost-effective choice for many parents.
Tips for Using a Diaper Genie Effectively
The key to using a Diaper Genie effectively is to ensure it’s well-maintained and regularly cleaned. This way, your Diaper Genie will continue to provide a convenient and odor-free solution for diaper dispo
- Regularly empty the Diaper Genie: To prevent odors from accumulating, make it a habit to empty your nursery trash can frequently, preferably once a week or more often if you have multiple children in diapers.
- Use baking soda for extra odor control: Sprinkle a little bit of baking soda into the bottom of the Diaper Genie each time you change the bag. This can help absorb additional smells and keep your nursery fresher.
- Ensure the lid is tightly closed after each use: After disposing of a diaper, ensure the lid is properly closed to prevent odors from leaking out.
- Use original refill cartridges for best results: While many off-brand refill cartridges are available, the original Diaper Genie refills can provide the best odor control and fit.
- Keep your Diaper Genie clean: Periodically, dry it with warm, soapy water or a disinfecting wipe to keep it fresh and hygienic.
Conclusion: How to use diaper genie?
The Diaper Genie is a game-changer for new moms, providing a convenient and hygienic way to dispose of dirty diapers. By following this complete guide on how to use a Diaper Genie effectively, you’ll be able to maintain a clean and odor-free nursery while focusing on the joys of motherhood. So, embrace this fantastic invention and make diaper changes effortlessly part of your parenting routine!
Remember to prioritize safety, gather supplies, and follow each step carefully. Doing so will maintain a clean and odor-free environment for yourself and your little one.
So go ahead and become a Diaper Genie pro! Your baby’s nursery will thank you for it.
1 Visit today